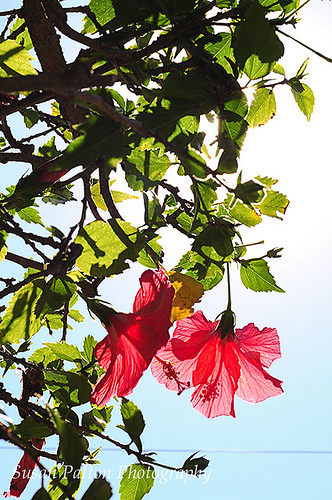
I began with a desire to find something different. Admittedly it is getting more and more difficult to choose a subject for Project 365 that is in or around my house. But I keep trying. I found myself once again drawn to the red hibiscus bush that borders our property with our neighbor's. In my head I was thinking put your camera someplace new. But where? Finally I got down on the ground and lying flat on my back looking up at the bright blue sky I began to observe and wonder. I am learning not to rush the process but to sit (or in this case lie) still and soak in my surroundings, inevitably the shot finds me. After a few minutes I took note of two blossoms huddled together, gently swaying in the breeze and knew I had found my subject.
It is difficult shooting into the sun but with a little effort and understanding of the process the results can be oh so rewarding. My first attempts were pretty, but nothing special. The back lit blossoms were aglow but I had too much greenery and the power line ran across the lower portion of the frame. This can be removed in Photoshop, but why not do it in the field?
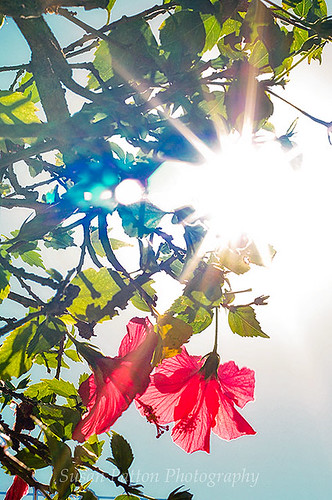
As I wiggled around on the ground, trying different angles I wondered what might happen if I captured a sun star. I began by increasing my f-stop to 16 or 18. I was using a 50 mm lens and this was as high as my lens would go. If you are using a point and shoot camera try setting it to the landscape mode. This should give you the greatest depth of field possible on your particular camera.
Secondly I placed the flowers where I wanted them to appear in the frame and began to move the camera ever so slightly. My goal was to catch the sun just peeking from behind a leaf. If you watch carefully you can actually see a starburst in your viewfinder. Sometimes I use a tree branch, a building, a cloud anything that partially blocks the sun will work.
The shot below is an improvement over the first but still there were flaws. (That's a joke. ALL of my pictures have flaws. Every. Single. One.) The starburst adds interest to the scene but I think overtakes it. In this case the starburst becomes the focal point, the pretty pink flowers the secondary subject.
I wiggled and moved some more and finally found what I was looking for in the image below. The star burst is prominent but in this photograph it compliments the flower by drawing attent to it rather than from it. Success. I got what I wanted.
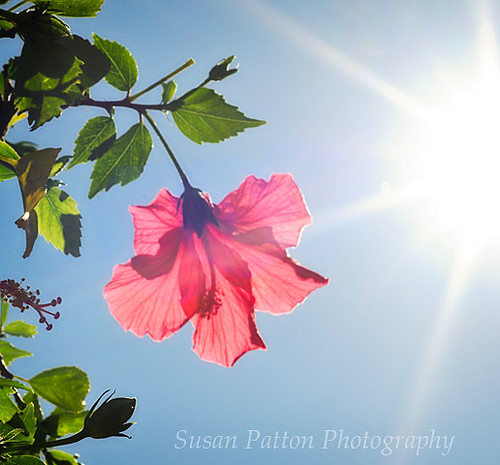
Sun stars are fun to play with and relatively easy to achieve. Go ahead, give it a try. I think you'll find it gives your images a interesting twist.
If you would like to see my choice as the best of the afternoon click on the Project 365 link below.
P.S. Henna is grounded. She's not allowed to use the computer for two weeks. Bad doggy.
Link to Project 365
3 comments:
Lovely. Thanks for the instructions. Be sure not to look at the sun - even through the viewfinder! I really like the last image posted on the blog, the square one with the single flower. PS: Interesting that you think the images just come to you if you wait long enough. Someone without an artist's eye would wait a VERY long time!!!! Like, an eternity.
LOVE the flower of the day!! But what I liked was the sheerness of the flower with the light filtering through. My fave was also the last one posted on the blog, being how I love the sunburst as I do! Actually loved the humor in your post with Henna in the drivers seat yesterday! YOU are so creative!!!
I love the pics, the last one especially...but the whole time I am reading this, I couldn't help but think "Is she nuts? There are lizards on the ground!!" I guess I show my Northern roots.
Post a Comment